Streamline and Accelerate LWC Development with Salesforce’s Local Development Server (Beta)
Tired of constantly deploying and refreshing your UI every time you update your Lightning web components (LWCs)?
With Local Dev (beta), you can streamline your workflow by developing your LWCs while previewing them in real-time directly within your Lightning app or Experience Cloud site.
Note: Before you begin make sure that you have the latest version of the CLI command, run “sf update”.
Step 1: Install the Local Dev Plugin
To begin, install the Local Dev Plugin using one of the following commands based on your environment:
For Production or Scratch orgs:
sf plugins install @salesforce/plugin-lightning-dev
OR
sf plugins install @salesforce/plugin-lightning-dev@latest
For Sandbox environments:
sf plugins install @salesforce/plugin-lightning-dev@prerelease
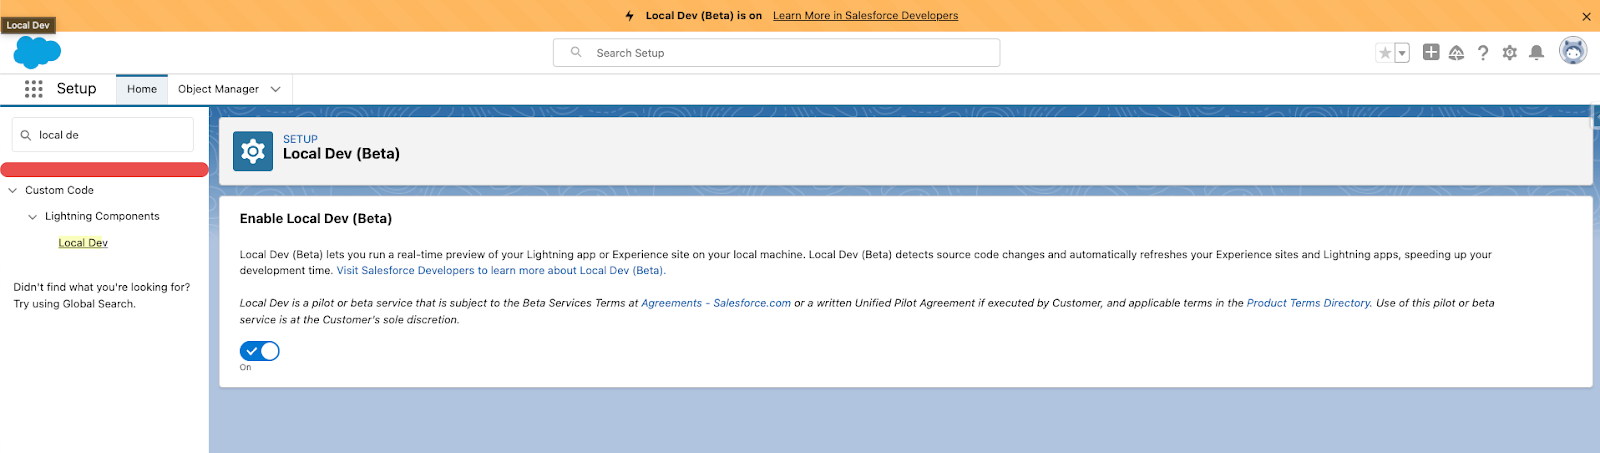
Step 2: Enable Local Dev
- Navigate to Setup in Salesforce.
- In the Quick Find box, type Local Dev.
- Select Local Dev and enable the feature.
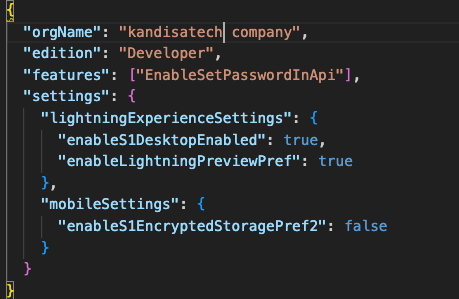
Step 3: Enable Local Dev for Your Scratch Org
To configure Local Dev for a scratch org:
- Open your SFDX project.
- Locate the config/project-scratch-def.json file.
- In the settings section of the file, add the following key
"enableLightningPreviewPref": true
Step 4: Preview
Use Local Dev to run a preview of the following types of Salesforce projects.
- Lightning Experience apps (desktop and Salesforce mobile app)
- LWR Sites for Experience Cloud
To preview your application, use the following steps:
Run the command below in the CLI to start the guided setup:
sf lightning dev app
- Alternatively, if you want to bypass the guided steps, you can directly use the following command in the VS Code terminal:
sf lightning dev app --target-org --name --device-type --device-id --flags-dir
Replace the placeholders with the appropriate values for your project. This will launch the application preview.
Guided Steps When Running the Command sf lightning dev app:
1.The command will first prompt you to select the device type.

2.Next, it will ask you to choose a Lightning Experience App available in your org.

3.Once completed, your Scratch org will open with the message "Local Dev (Beta) is on" displayed prominently at the top.

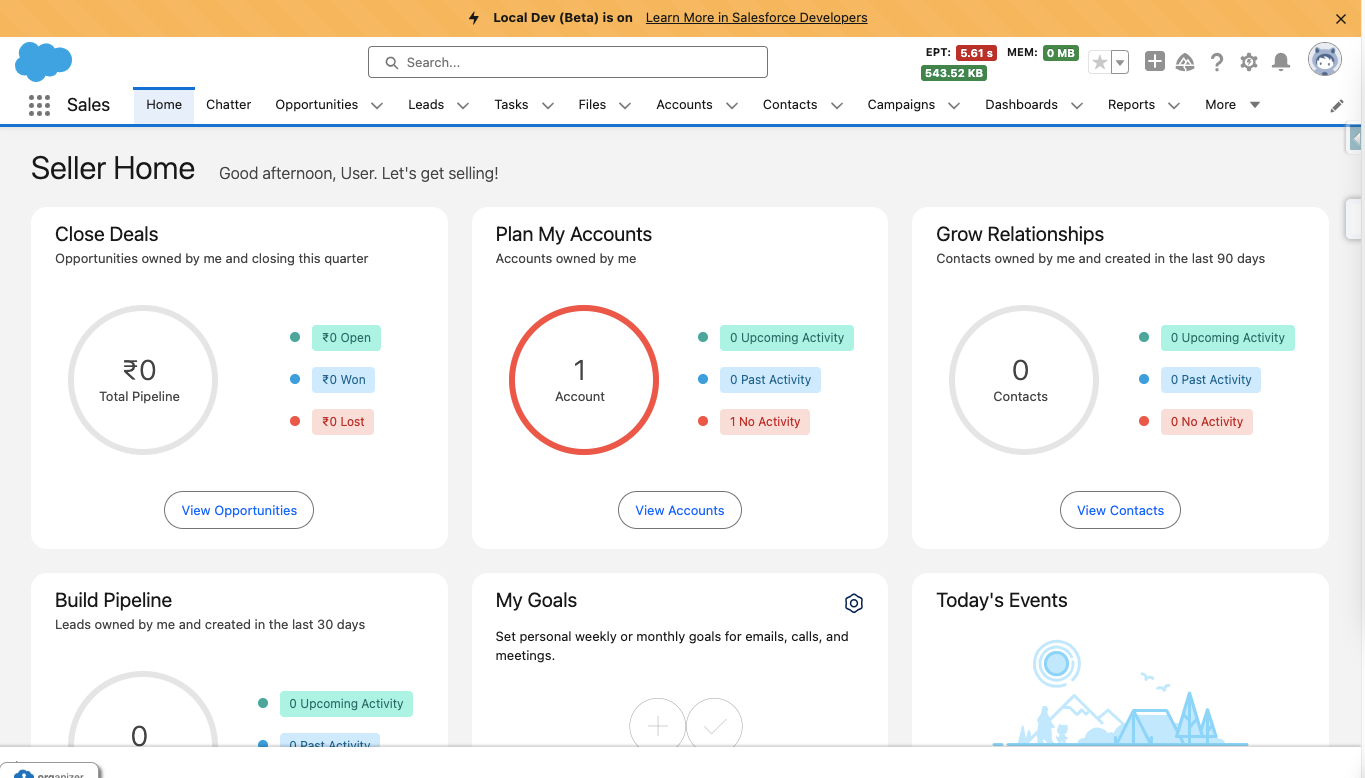
This completes the setup process for enabling Local Dev in your environment.
Step 4: Build an LWC Component and Experience the Real-Time Magic of Local Dev (Beta).
- Start by creating a Lightning Web Component (LWC).
- Embed the LWC into any Lightning app. For now, you can add it to any page in the Sales App.
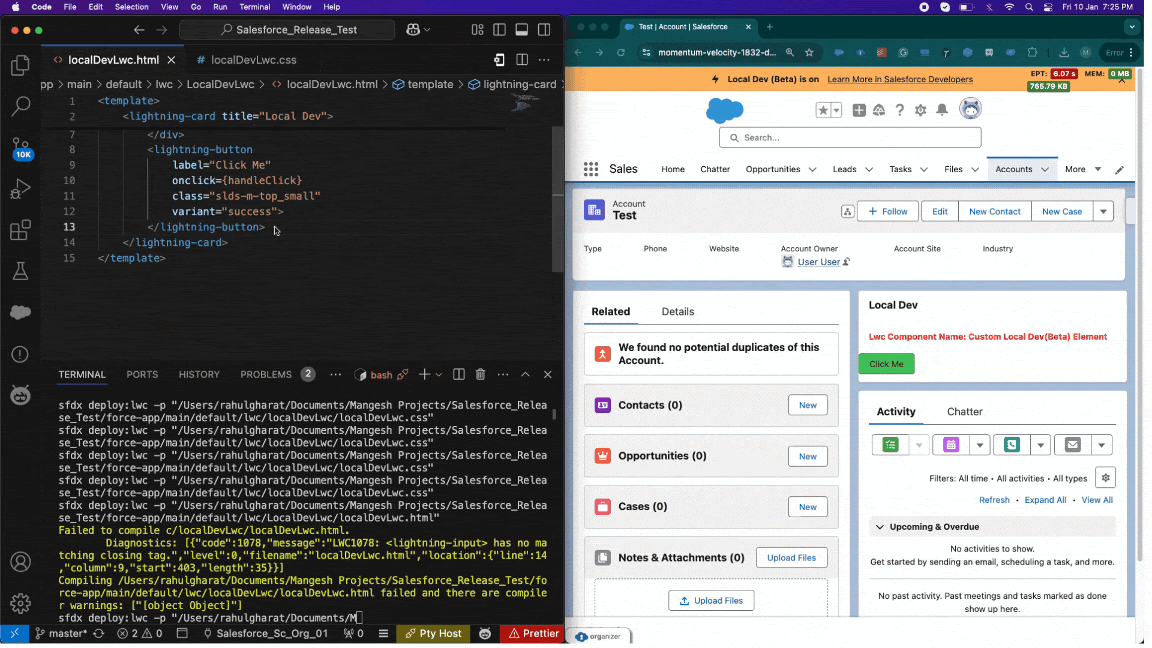
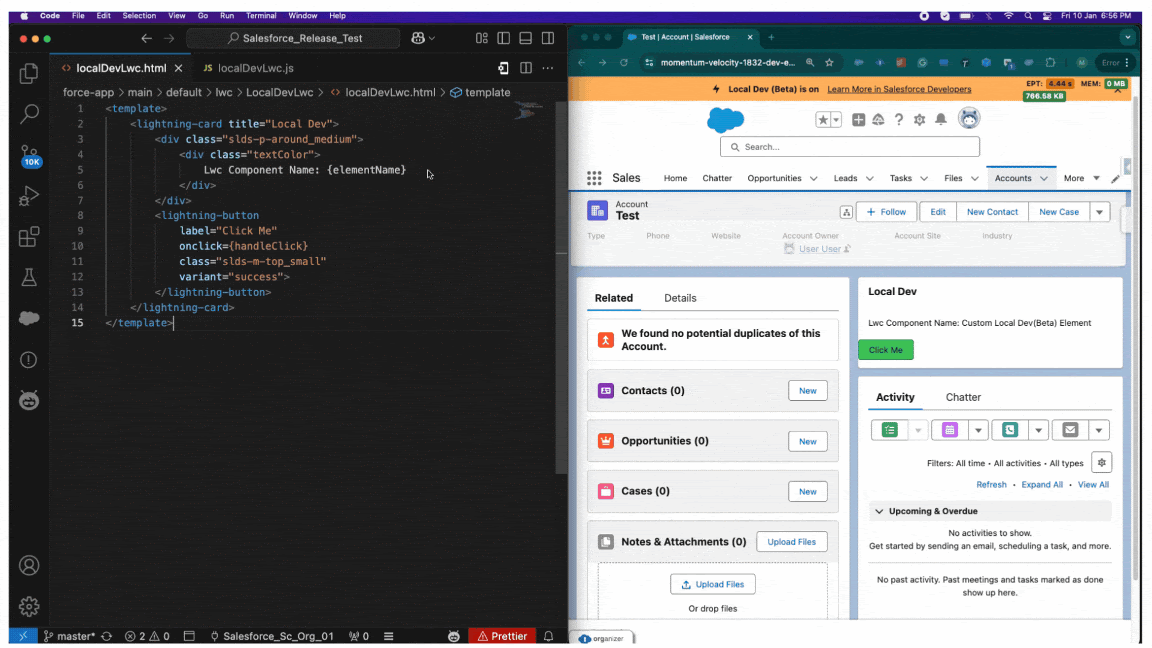
- Make changes to your LWC, such as modifying the HTML, CSS, or JavaScript. As soon as you save your code, you’ll experience the power of Local Dev (Beta), with changes reflected in real-time on the UI.
Notice how quickly the LWC updates, without needing to deploy your code or refresh the page. The changes are applied instantly!
Considerations and Limitations:
LWCs automatically update for the following changes only.
1. Basic HTML revisions: Changing component attributes, like in our case
lighting-button variant=”neutral” to variant=”brand”

2. Basic CSS revisions: Changing the text color of our .textColor class,
for instance,updating the text color from green to red
3. New reference to a component: like adding
to your markup
4. JavaScript changes in component methods that don't affect the component's public API. Like in our case, we changed the value for the elementName private variable i.e. we updated the button click js logic.
5. Importing a new CSS-only component
The following changes do not automatically load in your local development preview:
- Adding a new @api property or method.
- Making updates related to wire adapters, such as importing a new wire adapter, updating an existing one, or adding @wire to a property.
- Importing new modules from the @salesforce scope.
- Modifying the .js-meta.xml file.
To preview these changes, you must manually deploy them and refresh the UI.
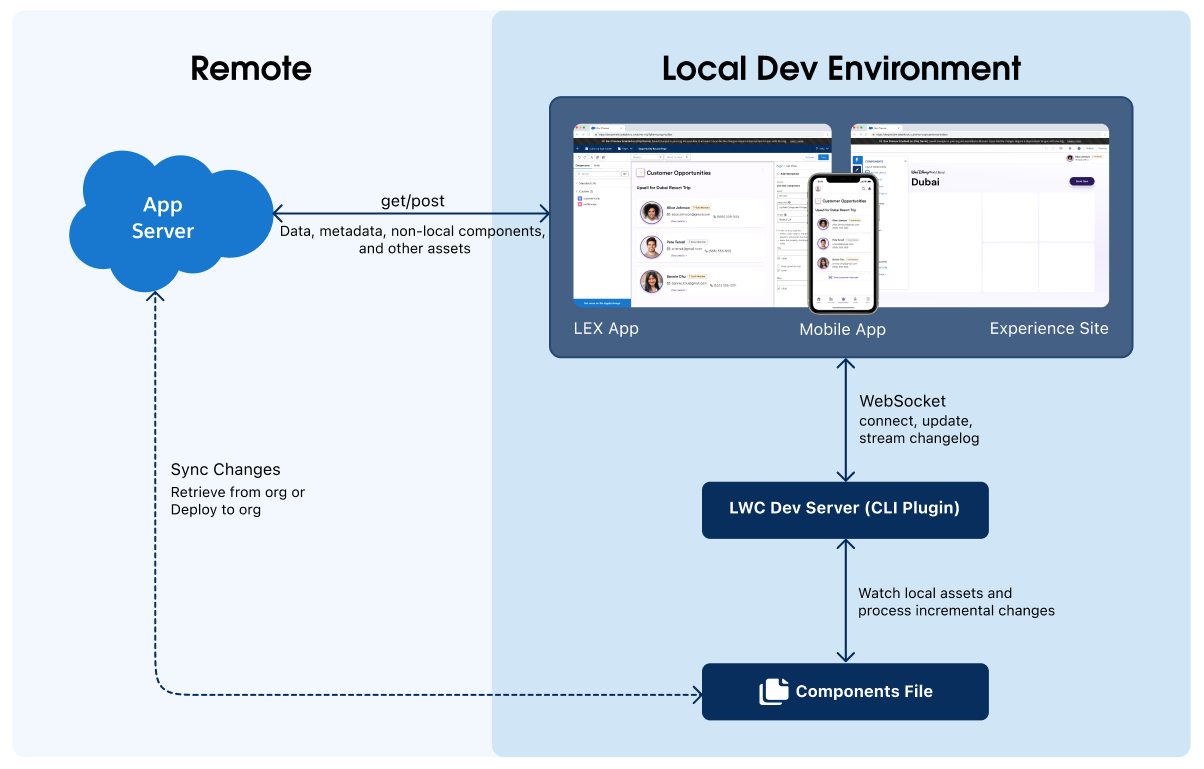
How Local Dev Works in the Background
When you start Local Dev, you will notice
- The Salesforce app launches in a browser or mobile emulator in a dev preview mode with a built-in Hot Module Replacement (HMR) client.
- A local dev server is set up to monitor changes made to your LWC code.
- The browser or emulator and the dev server establish a secure two-way communication using an authenticated WebSocket connection.
- When you modify an LWC, the dev server detects and compiles the changes.
- The compiled updates are sent to the browser or emulator through the WebSocket using HMR APIs.
- This process eliminates the need for a full page reload, saving time on deployment and refresh cycles.
In summary, the Local Development Server allows you to preview Lightning Web Components (LWCs) locally. Once you are confident that the changes align with your requirements, you can move forward and deploy them to your Salesforce org.
Reference:
- Develop LWC at Lightning Speed with the New Local Dev Experience
- Preview Components with Local Dev
https://developer.salesforce.com/docs/platform/lwc/guide/get-started-test-components.html
- Develop Lightning Web Components Faster in a Real-Time Preview (Beta)
https://help.salesforce.com/s/articleView?id=release-notes.rn_lwc_local_dev.htm&release=252&type=5
Article by Mangesh Kadam, Salesforce Developer at Kandisa Technologies
Linked In : https://www.linkedin.com/in/mangesh-kadam/